Planting onions is an entertaining activity to engage in. The nutritional value of onion has made it an asset in every kitchen. Red onions are naturally packed with phytochemicals and protect against cardiovascular disease, liver damage, and kidney problems.
If you have a little garden in your backyard or a well-spaced garden, then you should definitely grow some red onions. In today’s post, we will be looking at how to grow red onions from scraps.
Growing red onions from scraps involve cutting the root end of the onions and leaving it to dry for at least 24 hours. Remember to hang the onions over a bowl of water before planting.
Table of Contents
How To Grow Red Onions from Scraps

Onions are versatile vegetables and thus can be used in everyday recipes. It makes sense to grow onions in your house and garden.
Suppose you want an endless supply of onions, then you should grow onions from discarded onions scrap. Have it in mind that a single scrap can yield 3 or 4 onions.
Below are steps to grow red onions from scraps.
Step 1: Get a Red Onion
This is quite an obvious step, isn't it? To grow onions from scrap, you sure do need an onion bulb. So, the onion scrap can come from your store-bought onions. It is essential to get a healthy-looking red onion.
Note that while this post focuses on red onions, various species of onions (red or brown) can be grown from scraps. Thus, you are welcome to use any onion type.
Step 2: Chop the Onions from The Bottom
The second step involves getting the onion scrap. Use a sharp knife to cut off the bottom. Ensure to leave the scrap with a little bit of flesh or exactitude; the scrap should be about 2.5 cm long.
Remember that you can grow red onions from scrap indoors or outside. If you're growing the onions outside, it's best to start your cuttings in early spring. If you want to grow your onions indoors, any time of the year is fine.
Step 3: Dry Out the Onion Bottom For At Least 12 – 24 Hours
This step is optional. After chopping the onion, you can either discard the rest of the onion or use it for cooking while placing the onion bottom on a flat dry place with the cut side facing up.
Allow the bottom to dry out for 12 – 14 hours or until it is calloused and dry to the touch.
Step 4: Use Toothpicks to Poke into Each Side of The Onion Bottom
This step is also optional, but it is preferred as it aids easy sprouting of roots at the bottom. The toothpicks are meant to serve as suspenders as you hang the onion scrap over a container of water.
To achieve this, drive the toothpick through the side of the scraps. This should be done carefully so as not to pierce the center of the scrap and prevent regrowth.
The toothpicks should be spaced apart equally, resembling an "X" in spacing.
Step 5: Suspend the Onion Scrap Over a Container of Water
In this step, you discover the importance of piercing the onion side with toothpicks. The toothpicks serve as suspenders as you hang the onion scrap over a container of water.
If you, however, skipped step 4, get a shallow container filled with water so that the onion scrap can sit comfortably over the water and in direct contact with water.
The endgame ensures that the bottom of the scrap onion is always in contact with the water. To help the scrap grow faster, place the container near a sunny window or place it outdoors.
In 3-4 days, you will notice that the onion rings will gradually start to separate as the center of the scrap onion starts to regrow. Make sure that the onion scrap is always in contact with water.
On another 3-4 days, you will notice a new onion regrowing out of the scrap. Have it in mind that more than one onion can regrow from one onion. In some cases, 3 – 4 onions can regrow from a single onion bottom.
Step 6: Transfer the Sprouting Onion to The Soil
Knowing that the regrowing onions cannot thrive on water alone, it is time to transfer the sprouting onions into the soil.
If more than one onion regrows from the onion scrap, use a sharp knife to separate the conjoined regrows. Get a bucket of about 23 cm wide and 17 cm deep filled with ordinary garden soil mixed with some compost.
To transfer the sprouting onions into the soil, dig holes into the soil and insert the sprouts. Ensure that the holes are deep and wide enough to accommodate the rather lengthy roots that have developed.
You can either keep the onion cutting indoors or outdoors in sunny weather. Make sure to fertilize and water your onions regularly as they flourish!
How To Care For Red Onions

Transferring the onion bottom into the soil is just the preliminary step. You need to take active steps to ensure that your onion plant flourishes.
Follow the steps below to ensure a healthy plant.
1. Water Weekly
Naturally, onions need plenty of water to stay healthy and grow more onions. Water your onion plant weekly; if the soil feels dry to the touch, water the plant until the soil is moist.
2. Weed Regularly
If your onion is planted outside, weed regularly to prevent invasive plants and weeds from stealing your plant water and nutrients.
Also, check for pests on your onions. If you notice any, spray the onion with a non-toxic, plant-friendly insect repellent.
3. Fertilizer At Least Once in Two Weeks
Spraying your onion plant with a nitrogen-rich fertilizer at least twice a month.
Regular fertilization of your onion plant helps it grow large, healthy bulbs. Stop fertilizing when the bulb starts poking out of the soil.
4. Harvest Your Onion When It Starts to Flower
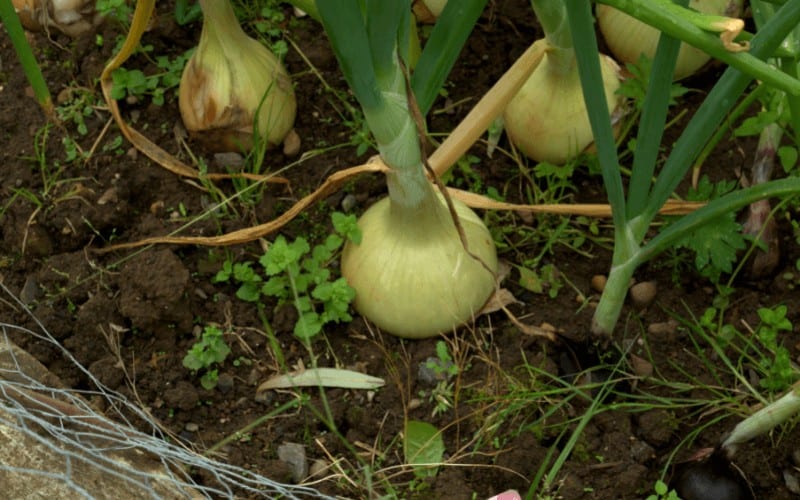
Onions grown from scrap will take about 90-120 days to grow a new bulb. Once the onion starts to flower, it simply means it is time to harvest.
To harvest, use a shovel to gently loosen the soil around the onions and pull it out of the ground.
Conclusion
From this post, one can glean that growing red onions from scraps or bottom is relatively straightforward.
The best part is that a single onion gives you more than one onion. This invariably guarantees a good supply of fresh onion for a long time to come.
Thinking of how to grow red onions from scraps? With this method, you won't have to spend money on onions again. Most importantly, you can grow the red onions indoors or in your garden!
Related Posts:
- How to Grow Broccoli From Scraps
- How to Grow Zucchini from Scraps
- How To Grow Rutabaga From Scraps
- How To Grow Cauliflower From Scraps
- How to Grow Turnips From Scraps


